- One of the fastest way to let Google index your site is comment on the other blogs. Those blogs are regularly crawled and indexed by Google in less than 24 hr. When you comment on their blog, Google bot will follow the link you have left in the comment to your new site and index it. I also like this tip because I can exposure myself with other bloggers, make friends and be more involved in the blogsphere.
- My favorite blog to comment is Blogussion and FamousBloggers. They have very good posts, the active community and comments are CommentLuv enabled.
- Submit your site to social bookmarking site like Digg, Mixx, Reddit, YHacker News and lots more is another great way to fasten the indexing process. These social bookmarking site is highly appreciated by Google and crawled very often. That also decrease the index time of your website.
- Another way to get your blog indexed fast by Google is pinging. For me, I only ping once for every new post and I often use pingomatic service. It’s free and what it does is it send the small notice to search engines that your blog has been updated so index it.
- You also have to add your website to Google Webmasters central and submit a sitemap to it. For sitemap generation in WordPress, I use the plug-in called Google XML Sitemap.
Monday, May 30, 2011
Tips on how to get your blog indexed fast by Google
Add a virtual tip jar to your blog
We know that most of you blog for the sake of sharing your thoughts and opinions, however a little side income is like an unexpected gift. Today we’re releasing a new gadget that allows your readers to directly contribute to your blog. The gadget can be added to any part of your page, but we’ve formatted it to fit best in the sidebar.

Setup is only five simple steps and should only take a few minutes of your time; just follow the steps below:
Sign up for a Google Checkout Merchant account at checkout.google.com/sell
Be sure to enable the HTML API by going to the Settings tab, clicking the integration link and unchecking the “My company will only post digitally signed carts” checkbox. Also, copy the Merchant Id for use in step 5.
Back in Blogger, on the Design | Page Elements tab click “add a gadget” where you wish to place the Support gadget.
Add the 'Support My Blog' gadget from the gadget gallery.
Customize your support button settings. The Checkout Merchant Id is the one you copied down in step two. Save and you’re done!
Your supporters can now contribute to your blog. Clicking on the support button will direct your supporters to Checkout to complete the transaction. For an example of the support button in action, please visit the following blog:
Engage your audience with Follow by Email
Fresh content is the fuel that drives the blogosphere; it keeps readers coming back to your blog. Our team is always thinking of new ways to connect users with the freshest content across Blogger, and today we’re happy to offer a new, powerful way to do just that with Follow by Email.
The Follow by Email gadget provides blog authors a simple way for their readers to subscribe to the latest hot-off-the-press updates, which are delivered directly to the reader’s inbox. When new blog content is published, all subscribed readers will receive a daily email notification of the new published posts, which includes a copy of the new content as well as links back to the actual posts.
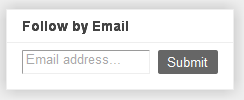
To enable Follow by Email, click the Add a Gadget link from the Design | Page Elements tab, and then select the Follow by Email gadget which should be at the top of the list. Once you add the gadget, readers visiting your blog can then just enter their email address and click Submit.
Taking advantage of Feedburner technology, Follow by Email will also track your subscription information, such as the number of subscribers and daily views. To view these stats, log into Feedburner.com, and select the appropriate blog feed from your list.
By Blogger Buzz
The Follow by Email gadget provides blog authors a simple way for their readers to subscribe to the latest hot-off-the-press updates, which are delivered directly to the reader’s inbox. When new blog content is published, all subscribed readers will receive a daily email notification of the new published posts, which includes a copy of the new content as well as links back to the actual posts.
To enable Follow by Email, click the Add a Gadget link from the Design | Page Elements tab, and then select the Follow by Email gadget which should be at the top of the list. Once you add the gadget, readers visiting your blog can then just enter their email address and click Submit.
Taking advantage of Feedburner technology, Follow by Email will also track your subscription information, such as the number of subscribers and daily views. To view these stats, log into Feedburner.com, and select the appropriate blog feed from your list.
By Blogger Buzz
Blogger Tutorial: Create Read more with button
Tip: For searching codes in the Html, use Ctrl+F to search in your browser.
Firstly create a read more button. .
Then Upload your buttons on the blog. If you don't know how to - Click Here.
Now replace the link in the following code with your button link.

Save this code as your "BUTTON HTML".
How to create Image Gallery using Blogger Post???
How to create Image Gallery using Blogger Post?
- Login to blogger with your ID.
- Click New Post.
- Give a title for your image gallery, e.g. My PhotoShop.
- Click Insert Image tool.
- Click Choose files. Select a file of the image you have prepared and then repeat for next images from Choose Files.
- Once all images have been uploaded, click Add Selected.
- Click Save as Draft.
- Done.
If you need to add new images to your image gallery next time, remember the steps below and follow.
- Click Posts tab.
- Click Edit Posts.
- Click on the Edit for the draft post where your image gallery is created.
- Upload the images as the steps explained above.
- Click Save Now.
- Done and let this post as draft.
How to change the text Read more in Blogger!
Below is how to change the text “Read more” in Blogger:
- Login to Blogger and Click Design.
- Click Edit at Blog Post.

- At the field next to Post page link text: you will find the text Read more, and then change the text with your own text such as Continue reading or anything else as you want.

- Click SAVE.
- Done. Now see the result. The text “Read more” should have been replaced with the text you have entered.
Add Statcounter to your blog!
StatCounter is packed full of useful and powerful tools to help you make better decisions about your website. A list of many of our features is below - just click on a feature for more detail (and check out the Live Demo for a hands-on look!).
Remember, unless otherwise stated, all these features are part of our free service!
Remember, unless otherwise stated, all these features are part of our free service!
- Log-Size
- Invisible Counter Option
- Configurable Counter
- Configurable Summary Stats
- Magnify User
- Drill Down
- Popular Pages
- Entry Pages
- Exit Pages
- Came From
- Keyword Analysis
- Recent Keyword Activity
- Search Engine Wars
- Visitor Paths
- Visit Length
- Returning Visits
- Recent Pageload Activity
- Recent Visitor Activity
- Country/State/City Stats
- Recent Visitor Google Map
- ISP Stats
- Browser Stats
- O.S. Stats
- Resolution Stats
- JavaScript Stats
- Email Reports
- Multiple Site Management
- User Access Management
- Public Stats
- Blocking Cookie
- HTTPS Tracking [Upgraded Members Only]
- Custom Branding Logo [Upgraded Members Only]
Subscribe to:
Posts (Atom)