Search This Blog

Thursday, June 2, 2011

Twitter Introduces One-Click 'Follow' Button


There's a new way to get your customers to follow you: Add a Twitter "Follow" button to your Website. On Tuesday Twitter announced a new Follow button, similar to the "Tweet" button, for third-parties to add to their Websites. The new Follow button lets Twitter users instantly follow a Twitter account without having to leave the site they're on. This is particularly convenient, because users no longer have to search Twitter to find the account they're looking to follow (which can be a hassle). The button is similar to Twitter's Tweet button, which lets users tweet specific content with their own followers. So its a good thing for your blog.


Here's a press release from Twitter:-
When you follow interesting accounts on Twitter, it’s easy to stay connected with what’s most meaningful to you. Today we’re excited to launch the Follow Button, a new way to discover and instantly follow Twitter accounts directly from the websites you visit everyday.

Switch to the new post editor


An overview of the new post editor


How to enable the new editor


To enable the new editor, first navigate to your blog's Settings | Basic tab. Near the bottom of the page you will see a field called Select Post Editor and from there you simply need to select Updated Editor and save your settings. That's it! Now on to the new features...

Get a share sidebar!

Got a website? Then the ShareSidebar is a must-have (see it on the right-side) The sidebar will increase sharing by 20-30% because of its unique and permanent position. Add the sidebar to your website now. It's easy and it's free.


To get it: - 

  • Go Sharesidebar.com
  • Select where you want to place the sidebar(Left or Right).
  • Add the services you want which include Facebook, Twitter, Delicious, Digg, Google Buzz, StumbleUpon, Reddit, Yahoo Buzz and others.
  • Type your Email.
  • Enter your blog's URL.
  • Click 'Get Code'

How do I add an "I Power Blogger" button to my template?


Standard blogger button:
Powered by Bloggeris available at http://buttons.blogger.com/bloggerbutton1.gif for your including pleasure. Blog on!
To include it somewhere in your blog, copy and paste this code into your template:
<a href="http://blogger.com/" title="BLOGGER"><img src="http://buttons.blogger.com/bloggerbutton1.gif" /></a>

More buttons available too:
Powered by Blogger
http://buttons.blogger.com/blogger-ipower-blue.gif

Powered by Blogger
http://buttons.blogger.com/blogger-powerby-blue.gif

How do I buy a custom domain through Blogger?


Interested in purchasing and setting up a custom domain through Blogger? Either read the instructions below or click on the video to watch a tutorial!
You can buy a domain from the Settings | Publishing tab. Simply select the Custom Domain option, enter the domain name you'd like and click Check Availability. This will take you to the Google Apps domain purchase website, which will let you know if the domain is available and proceed with the registration if it is. Finally, you'll go to Google Checkout where you'll make your payment. Your domain is registered with one of our registration partners, either eNom or GoDaddy.
You'll get a domain registration confirmation email from Google Apps. Clicking the link in this email allows you to sign up to this domain for an Apps account. Google Checkout will also send you an email with the order receipt.

How do I use a custom domain name on my blog?


Publishing on Blog*Spot is the fastest and easiest way to use all of Blogger's great features. (And free of charge, no less!) If you don't care to have blogspot.com in your blog's address, though, you can get a domain of your own. We'll continue to host all your content as before, but it will be displayed at your new address.

Choose and Register Your Domain

The first thing you'll need to do is to choose a domain name, such as example.com and register it. You can register domain names from any of a number of different registrars and you can use .com, .org, .net or any other valid addresses. Remember: you only need to get the domain name; you don't have to pay extra for hosting service. The easiest way to register a domain is to buy your domain directly through Blogger. If you go this route, we'll automatically configure all of your relevant DNS settings and attach your new domain to your existing blog immediately.

Update the DNS Settings

DNS stands for Domain Name System and a DNS server determines what site a given address takes you to. So far, you have a domain name but none of the servers on the Internet know what to do with it yet. To take care of this, you need to do two things:
  • Create a CNAME record for your blog's address, which should be a subdomain of the form www.example.com.
    To create a CNAME record for your domain with the DNS, associating your domain with: ghs.google.com. The exact procedure for doing this varies depending on your domain registrar, but you can find instructions for many common registrars here. If yours isn't listed, or if you run into other difficulties, you can contact your registrar directly and they'll be able to help you out.

How to add Recent comments in the sidebar?


Note: This article assumes you are using a classic template (without the Layouts features).
Providing a handy list of recent comments is a good way to let visitors see who else is reading and commenting on your blog. Also, if they are following any of the comment threads, it will be easier for them to see at a glance if other people have joined in the discussions. This feature might sit in your sidebar and look something like this:
The date on each line will link to the page holding that particular comment so it can be read in full. Note that you can change the format of the date (and/or include the time as well) by changing the comment timestamp setting on the Settings | Comments tab in Blogger.
Comments left by Blogger members will have their names linked to their profiles. Anonymous comments, or comments left as "Other" but without a URL specified, will be unlinked. If someone comments as "Other" and specifies a URL, that will be the destination of the link.
Here's the code you need to get this in your blog:

Commenting on Blogger with OpenID


OpenID is an open standard that allows OpenID-enabled services users to log in to any OpenID-supported site with one set of login credentials. What does that mean for your blog? It's a way to authenticate user comments on your blog, without requiring your readers to have a Google Account. For example, let's say you have a friend, Brady from LiveJournal, who doesn't have a Google Account. With OpenID, he can now comment on your blog using his OpenID credentials and identify himself as the owner ofhttp://brady.livejournal.com, instead of commenting anonymously. Please see the OpenID site for more information about OpenID.

How do I enable OpenID Commenting on my blog?

Simply go to your Settings | Comments tab and select "Registered Users" or "Anyone" for the "Who Can Comment" option. Don't forget to click "Save Settings" at the bottom of the page. 
Note that allowing "Anyone" to comment on your blog will allow more than just OpenID users to comment.

How do I comment using my OpenID identity?

What are backlinks and how do I use them?


Backlinks enable you to keep track of other pages on the web that link to your posts. For instance, suppose Alice writes a blog entry that Bob finds interesting. Bob then goes to his own blog and writes a post of his own about it, linking back to Alice's original post. Now Alice's post will automatically show that Bob has linked to it and it will provide a short snippet of his text and a link to his post. What it all works out to is a way of expanding the comment feature such that related discussions on other sites can be included along with the regular comments on a post.
The backlinks setting can be found under the Settings | Comments tab and consists of a single, simple option to turn it on or off:
Our default templates are already set up with the necessary code for backlinks. However, if you have a custom template, or one of our templates from before this feature was launched, you will need to add the code yourself. Instructions for that are here.
Once everything is set up and you have republished your blog, you will see the number of backlinks listed for each post, along with the number of comments:
If you click that link you will be taken to the post page, where the backlinks are all listed beneath the comments. Clicking the triangles next to each link will display a snippet of text from the page linking to you, as well as some author and date information.

What is the word verification option?


The "word verification" option can be found on the Settings | Comments tab for your blog, and it looks like this:
If you choose "yes" for this setting, then people leaving comments on your blog will be required to complete a word verification step, similar to the one presented when you create a blog:

How do I delete comments?


You can delete any comment that you create on anyone else's blog, as long as you left the comment as a registered Blogger user. You can also delete any comments (registered or anonymous) that are left on your own blog, or on another blog for which you have admin privileges.
To delete a comment, first make sure that you are logged in to the correct Blogger account (administrator of the blog or author of the comment). Then go to the blog and find the page where the comment is listed. Next to the comment, you should see a trash can icon, like this:
Click the wastebasket and you will see this confirmation page, which also lists the comment for review:

Keeping Comments Clean


Blogger has several built-in measures for dealing with comment spam and other associated dastardly behaviour.

  1. Only five html tags are accepted:
    <a> (for making links)
    <strong> and <b> (for making text bold)
    <em> and <i> (for making text italicised)
  2. All links will automagically use the rel="nofollow" tag, so they will receive noPageRank boost.
  3. You can choose to receive notification by email when new comments have been posted on your blog. This way, you can monitor them for spam and delete themwhen necessary.
  4. You can enable word verification for your comments. This will require an extra step in the commenting process, which will deter automated comment spamming systems.
  5. You can enable comment moderation, which will let you view new comments and approve or reject them before they appear on your blog.

How to use different styles of posts for different members of a blog?


By default, Blogger includes an author's display name next to every post in a blog. In group blogs, you can use this feature to create a different appearance for posts written by different users. For instance, one user could post in red and another in blue, or their posts could have different background colours, or borders of different types. Anything that you can do in CSS you can apply to posts of a particular user. Here's a simple example involving colours.
Let's say we have two users sharing a blog, and their names are Alice and Bob. Ordinarily when they post, their entries look the same, like this:
Post screenshotBut now we decide that's too boring. So we're going to make all of Alice's posts be in blue and all of Bob's posts will have a yellow background. First, go to your template and find the Blog Posts section.
You'll see in there either a <$BlogItemBody$> tag or a <data:post.body/> tag, depending on whether you have a classic template or are using Layouts. This tag inserts the text of an entry. Around that, we'll put a span tag with the author's display name as the class. This means that Alice's entries will say class="Alice" and Bob's entries will sayclass="Bob". Here's what the change looks like:
(for classic templates)

<span class="<$BlogItemAuthorNickname$>">
   <$BlogItemBody$>
</span>

(for layouts)

<span class="<data:post.author/>">
   <data:post.body/>
</span>

Now we just need to add Alice and Bob to our style sheet, so that these classes mean something. You can find the style sheet towards the top of your template, between<style> tags. Add in the following Alice and Bob lines:

.Alice {color:blue;}
.Bob {background:yellow;}

Now save your changes and you're done. When you look at the blog again, Alice and Bob will have their own formats, like this:
Post screenshot

Can I have a blog to which more than one person posts?


These are called "team blogs," and are quite useful in situations where small groups of people wish to contribute to a single blog. Basically, one person initially creates the blog, then "invites" others to join it.
Team members can either be Administrators or not. Administrators can edit all posts (not just their own), add and remove team members (and grant admin access), and modify blog properties. Non-admins can only post to the blog.
Here's how to invite people to join a blog:
First, go to Settings | Permissions:

 Settings | Permissionsand click Add Authors:
Add Authors

What other ways are available to post pictures?


Aside from the image uploading tool built into Blogger's post editor, there are several other options to help you get pictures on your blog. Here is the list:
  1. If you have a camera phone or a similar mobile device, you can use Blogger Mobileto send photos to your blog. The attached images will be uploaded to the web and included in your post (in the same way Hello Bloggerbot below works).
  2. Hello BloggerBogWindows users can download Google's free photo software,Picasa and use the "BlogThis!" button to post pictures directly to their blogs. One advantage in using this method is that any edits you make in Picasa, like removing red-eye or lighting enhancements, are uploaded along with your photo. Captions written in Picasa are not transferred in this release and therefore you will need to add these in the Blogger post editor.
    See: Picasa Support for more information.
    Another option to try is the Hello BloggerBot (also from the people who created Picasa). We have an article on photoblogging which explains in further detail how Hello works. It also discusses some neat Hello features, such as customised Blogger/photo preferences.
  3. There are a number of third-party services that will let you post pictures to your blog, including FlickrBuzzNetFotoFlixPhotobucket and Photolightning.

How to automatically email a post after having written it?


Each of your blog posts can be automatically sent to a given email address, using our BlogSend feature. To configure this, go to Settings | Email:
Settings | Email
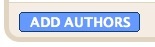
Then enter your email address:
Settings | EmailNotes:
  • BlogSend will only send email to a single address, so multiple addresses entered here will not receive the updates. If you want to send updates to more than one address, you will need to create a mailing list. You can use a service such asGoogle Groups to do this. Then just enter the mailing list address in the BlogSend setting.

On the Go with Blogger Mobile


By Biz Stone

See also: Blogger Mobile FAQ
In the past, mobile phones were rare and pricey. Rich businessmen carried them around in suitcases. I remember when I was in secondary school and Melissa Miller's dad had a car phone. That was fancy. Mr. Miller is a fancy guy. These days, mobiles are low-cost and everywhere. In many countries, mobile phones outnumber their land-line counterparts. Around the world, mobile phones are increasingly pervasive and this is especially true when it comes to developing areas. People even decorate, customise, and accessorize their phones to reflect their personality. Sound familiar?
Mobile phones are perfect little blogging appliances that people carry around with them everywhere. Sharing photos and stories with friends while you are on-the-go by sending them straight to your blog—what could be easier? Turns out it can be easier, that is why we created Blogger Mobile. To create a blog and post to it using your mobile phone, you will need to follow these directions:
(Send stuff to go@blogger.com and you are done.)
As indicated by the graphic above, sending an MMS or email to go@blogger.com will automatically create a new blog. Your photo, along with any text you add, will be uploaded to that blog right away and then we will message you back with the address so you can visit your new blog on the web. It is all free. When you feel like changing anything or you already have a Blogger account and you want the posts to go to your existing blog, you can log in to go.blogger.com and enter the token we sent to your phone.
Just so we are clear on this, you send something from your phone; a subject line, a photo, and maybe a caption if you so choose to go@blogger.com and we do the rest. That is our thing. We set you up with a standard issue blog using a popular design template and we upload your content so your friends and family can view it and leave comments. Your first post might look something like this:

Optional: Claiming Your Blog

We will name your blog "My Mobile Blog" and insert some text in the sidebar as a reminder that you can claim your blog. The text will read:
Claim your blog at go.blogger.com so you can change the style and colours, edit previous posts, or activate additional features. Note: You will need the claim code that was sent to your phone.
You do not have to claim your blog. In fact, you could never sit down in front of a PC again and just keep sending content from your phone to the Web. However, when you sign in and enter your token at go.blogger.com, that note about claiming will be replaced with your profile block and once you claim your blog, you have full access to all your settings so you can change the template and modify your account to your heart's desire.

Optional: Switch Your Mobile Posts to Another Blog

Another part of the claiming process is the ability to switch to an existing blog that you would rather have your mobile posts sent to. For example, if you already have a blog and think it would be cool to occasionally send a post from your mobile phone in addition to posting normally. Once you make that switch, both existing and future posts will be sent to the blog of your choosing instead of the blog that was automatically set up for you when you sent that first message to go@blogger.com.
Note to users whose blog address does not contain blogspot.com: Once you make the aforementioned switch, new mobile posts will be published to your chosen blog but mobile posts published prior to the switch will not be moved over automatically. So, if you plan on publishing mobile posts to your non-blogspot.com hosted blog, we recommend you claim and switch early thus avoiding a potential nuisance.

What Services Does Blogger Mobile Support?

The initial launch of Blogger Mobile will work with your phone if you are a US customer ofVerizonAT&TCingularSprint, or T-Mobile. We will be expanding that list so if your provider is not on there yet, check back with us here.

Use It Your Way

There was an article on the BBC's web site a couple weeks ago by a guy who was using his camphone and a blog to create what he called "digital postcards" to the web so his friends and family could follow along on his trip across the United States. That's the stuff! There's even a professional photographer traversing the US snapping photos exclusively with his camera phone. He has got a web team building his site—all you need for yours is Blogger Mobile.
Setting up a great looking web site that is yours to customise as you please and using a mobile phone to keep it updated is not as futuristic as your own personal jet pack, I appreciate that. In fact, when I was back in secondary school watching Mr. Miller talk on his car phone I imagined that by 2005 we would have personal jet packs. We don't. However, if I see someone flying around in a jet pack I will blog it with my camphone. That is most definitely something. We are getting there.
Biz Stone works at Google on Blogger and writes books about blogging.
Sorce: Google

Can I get site feeds for specific labels?


Yes, you can! If a blog you read is using labels and also has site feeds enabled, then you can pick and choose which topics you want to subscribe to. The format for label feeds is this:

http://blogname.blogspot.com/feeds/posts/default/-/labelname

Make sure you substitute in the correct blog address for blogname and the label you're interested in for labelname. Also, don't forget the hyphen ("-") in the URL. That's not a typo!
Note that a URL of this form will only work if the blog in question is using this specific label, and has also enabled site feeds. However, no special site feed settings are necessary. As long as the basic site feed for posts is enabled (with either short or full descriptions) then label feeds will also work.

How can I link authors' names to profiles on my team blog?


If you have several people posting to a blog, you might want to set it up so that each person's name at the end of their posts links to their profile. Comments currently work this way automatically, but we don't yet have this feature for regular posts. Here's a way to get around that and make it work.
First, what you'll have to do is get the profile addresses for each person who will be posting to the blog. You'll notice that each one looks something like this:http://www.blogger.com/profile/XXXXXXX where "XXXXXXX" is a particular ID number. Make a note of that number for each person.
Next, add the following code to your template, between the HTML <head> tags:

<script type="text/javascript">

var team = new Array();
team["First Member"]="XXXXXXX";
team["Second Member"]="YYYYYYY";
team["Third Member"]="ZZZZZZZ";

function makeprofilelink (authorname) {
     var pid = team[authorname];
     document.write("<a href=\"http://www.blogger.com/profile/"
     + pid + "\">" + authorname + "</a>");
}

</script>

Photo Albums, Photoblogs and Moblogs


Photo albums often make great companions to blogs. For instance, you might be blogging about your latest trip to Hawai'i and have dozens or hundreds of photos to share with your friends. If you create a photo album and upload your pictures there, your readers will be able to click a link and browse all your photos in easy thumbnail or slideshow formats. They could even order prints for themselves, and you wouldn't even have to worry about keeping track of how many reprints to get of which picture. It's very convenient all around.
There are a number of sites that offer free photo album services. You can do a Googlesearch to find them, or you can start by checking out some of these links:

How do I use the Blogger Reading List?


It's simple to add a blog to your Reading List. First, click on the "Blogs I'm Following" tab under "My Reading List" on your Blogger Dashboard.
Then, click on the blue "Add" button in the bottom left corner of your Reading List.
Next, insert the URL of the blog you'd like to follow in the URL box. You can add as many blogs as you'd like by clicking on "Add another". When you have added all of your favourite blogs, click the orange "Add" button.

How do I put AdSense after my individual blog posts?


If you're new to AdSense and not too familiar with making modifications to your blog's template, you can follow these instructions for placing AdSense code after your posts.Note: These instructions assume you are using a classic template, rather than Layouts.
Assuming you have already signed up and been approved for a Google AdSense account, you should be able to log in here. Once you're signed in, click the AdSense Setup tab near the top of the page. Choose "AdSense for content" as the product and the wizard will guide you step-by-step through the process. To cut right to the chase, focus on these steps:
  1. Choose Your Ad Units - Select either text ads, image ads, or both.
  2. Choose Your Ad Format - To fit ads in between your posts, it's best to choose one of the following ad layouts.
    • Banner (468 x 60)
    • Medium Rectangle (300 x 250)
    • Square (250 x 250)
    • Half Banner (234 x 60)

How do I remove my AdSense code?


Note: This article assumes you are using a classic template. On a Layouts-enabled blog, just click the "edit" link for your AdSense page element, the click the "Remove Page Element" button.
The special AdSense tab in Blogger's Template section does not currently have a way to automatically remove ads for you. So if, for some reason, you decide you no longer want to display ads on your blog, you'll need to remove the code manually. It's just a matter of finding the right code and deleting it, so it's pretty easy.
Click on the Template tab for your blog, and make sure you in the "Edit Current" view (where you see all the code) rather than on the AdSense tab. Then scan through your code until you find some code that looks like this:

How do add a poll to your blog?


Do you ever wonder about your visitors' opinions? Maybe you'd like to find out what your readers think about controversial subjects, or perhaps you just want a vote on whether you should change your blog's font to Verdana. Either way, it's simple to do by adding a poll to your blog.
You'll start by going to the Template | Page Elements tab for your blog:
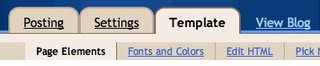
Click the "Add a Page Element" link that appears in the sidebar for your layout. You'll get a popup window with all the different types of page elements you can add to your blog. Look for the one called "Poll" and click on "Add to Blog".

How to put AdSense in your blog's sidebar?


Note: This article assumes you are using a classic template. For Layouts-enabled blogs, you can simply add a new AdSense page element to your sidebar, or drag an existing element to the desired location.
If you're new to AdSense and not too familiar with making modifications to your blog's template, you can follow these instructions for placing AdSense code in your blog's sidebar (using the Minima template as an example).
Assuming you have already signed up and been approved for a Google AdSense account, you should be able to log in here. Once you're signed in, click the AdSense Settings tab near the top of the page. To cut right to the chase, focus on these steps:

"Listing" and "let search engines find your blog" settings Share Comme


The Add your blog to our listings? setting determines whether or not your blog will be linked to from Blogger.com — specifically, the Blogger homepage and Next Blog. If you select "No," your blog won't appear in these places, but it'll still be available on the Internet. This blog will still be displayed on your profile, unless you hide it by deselecting the relevant checkbox on the Set Displayed Blog page.
The Let search engines find your blog? setting determines whether or not your blog will be included in Google Blog Search and if it will send a signal to Weblogs.com, a service which continually displays recently updated blogs, letting them know that you've made a new post. If you select "No," everyone can still view your blog but search engines and other content aggregation services will be instructed not to include it in their listings.
You can find these settings on the Settings | Basic page.

How to let people email my posts to their friends?


Email This Post enables your blog readers to share your posts with others. Let's say a visitor to your blog just loves your post about The Secret Valor of Chickens. Now that visitor can let her friends know about your discovery by emailing out a link to your post. It's a great way to let your readers share what they've seen on your blog. To enable this feature, set Show Email Post links? to Yes in the Settings | Basic tab in Blogger:
Quick Edit settingHere's what they look like:
Quick Edit link

Tweet Your Blog Posts!


Tweeting your new blog posts is a great way to engage your readers, and something that many on the team have taken advantage of for our own blogs. An easy way to do this is throughTwitterfeed, which automatically updates Twitter with each new blog post. Here's how to set it up:

Head on over to the Twitterfeed site, click Sign In with OpenID and type in your Blogger blog's URL. Once you've registered you'll then be taken to the New Feed page where you can start linking blog feeds to your Twitter account.

First click the Connect your feed to Twitter Account button, which will prompt you to enter your Twitter login credentials to authorize Twitterfeed's access. You will get a nice little confirmation once you've successfully linked up your Twitter Account.


Next just enter a name for your feed, as well as your blog's Feed URL into the form. If you want to customize your feed's settings you can modify frequency, add prefixes, and even create keyword filters. Otherwise you're all set—click the Create Feed button and your Twitterfeed is enabled.

You can always come back later to the Twitterfeed site and modify your feed settings, as well as look at click-through metrics for existing feeds.

Show off your favorite blogs with a Blog List

The Blog List - The Blog List improves on our Link List page element by using blogs’ RSS and Atom feeds to show update times, post titles, and snippets.


Use a Blog List to put a blogroll in your sidebar, or make a few to categorize the blogs you read. The Blog List works well for any page that has an RSS or Atom feed, so you can get creative: link to news sites, podcasts, Twitter streams, search results, or anything else with a feed.


Here’s a quick summary of the features that a Blog List gives you:

  • Link to blogs, web pages, and feeds from your blog’s sidebar, with an optional favicon
  • For pages with RSS and Atom feeds, Blog List can show last updated time, post title, and a snippet of the latest post
  • Sort links alphabetically or by last update time
  • Show all links, or hide some behind a “show all” link
  • Import subscriptions from Google Reader

Take Control of Your Site Feed

Feeds are a great way to reach a broader audience and keep your loyal readers up-to-date. In fact, it’s not uncommon for blogs to have more than a quarter of their traffic come from feed readers.

The challenge with feeds is that it’s never been possible to control exactly how much content is delivered. Up until now, the options have been “Short” and “Full”. Short produces a feed that contains around the first 400 characters of the post, with HTML and images removed. Full produces a feed that contains everything in the post, including HTML and images. But what about those instances where you want to give your users a tastean image or two with some introductory textand then have them visit your blog to see the full post? Well today we’ve launched a third option that lets you do just that using Jump Breaks.

To enable this feature, simply go to the Settings page for your blog, click on Site Feed, and then next to “Allow Blog Feeds”, change the drop-down value to “Until Jump Break”.

How to add Subscription links gadget in the sidebar?

Let your readers easily subscribe to your blog with popular feed readers.
  • First you need to make your make your account on a feedburner. 
  • Go to a popular feedburner. Ex. feeds.feedburner.com. 
  • Then create your site account. 
  • You will get a link. Ex. feeds.feedburner.com/HowToDoItOnBlogger
  • Go to your Blogger account.
  • Click Design | Layout.
  • Click Add a Gadget a the top of the side bar.

  • Choose Subscription Links.

  • Enter URL and the name of the widget.
  • Click Save when Done.


Add the +1 Button to Your Blog

“+1” is often used as a digital shorthand for “this is pretty cool.” It’s also a way for friends, contacts, and the rest of the world to find great things on Google search. Google launched the +1 button back in March as a way to help share web content and make search more personal and relevant. For more information about the +1 button, you can watch this short video:


Since Google made this feature available, web publishers and bloggers have been asking us how they can add the +1 button to their sites, including Blogger blogs. So, lets see how to add the + 1 buttons.